
 Tweet
Tweet
There are a lot of designs out there for router dado-cutting jigs. Most of them consist of several adjustable parts with slots and knobs and stop blocks that allow the jig to be used for angled or non-through dados. If all you need is a good way to cut straight, through dados, the easy-to-make two-piece jig illustrated here will do the job quickly and accurately.
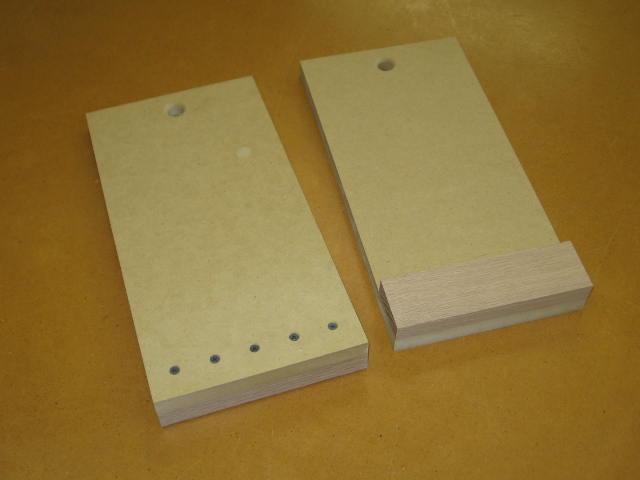
The jig consists of two identical halves; the first picture below shows one half right-side-up, the other upside-down. Each jig half is just a rectangular piece of 3/4" thick MDF, sized as needed (mine are 7" x 14") with a hardwood fence attached across one short end. The only critical part of the jig's construction is to make sure the fence is perfectly square with the long edges of the MDF.
The remaining pictures illustrate how the jig would be used to build a bookcase out of 3/4" plywood.
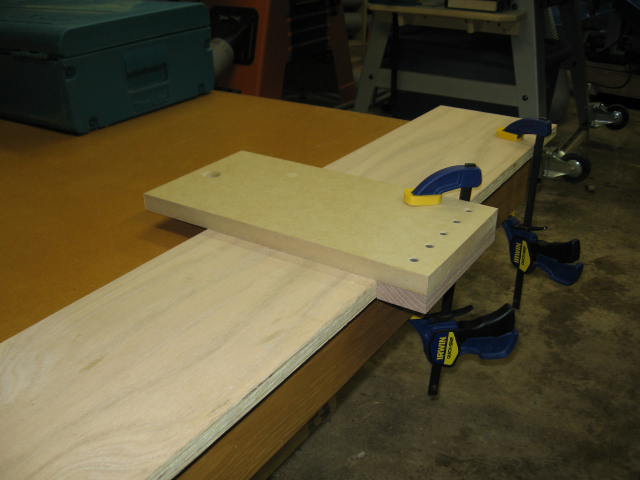
First, the end panel of the bookcase is secured to a bench or worktable and one half of the jig is clamped into place, with one long edge of the MDF aligned with one edge of the required dado. Note how the hardwood fence indexes against the workpiece, making the jig halves self-squaring.
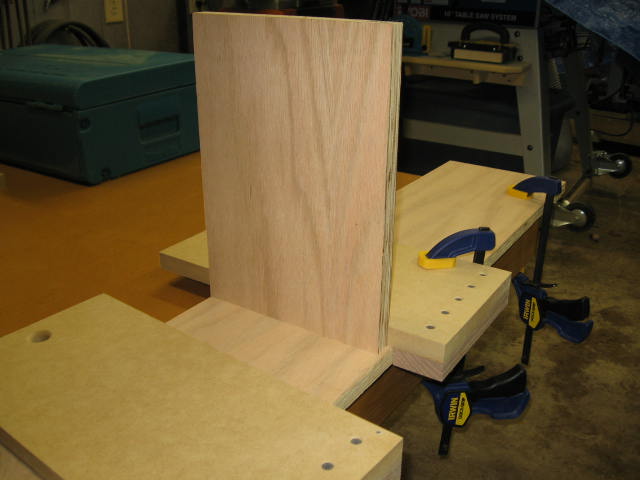
Next, a scrap piece of shelf material is set into place as a spacer to properly locate the other half of the jig. This is a foolproof way to ensure that the width of the dado will exactly match the thickness of the piece it will receive.
The dado will be cut using a top-bearing pattern maker's bit. This one is 5/8" diameter, which works well for 3/4" plywood, whether it is slightly undersized or a full 3/4" thick.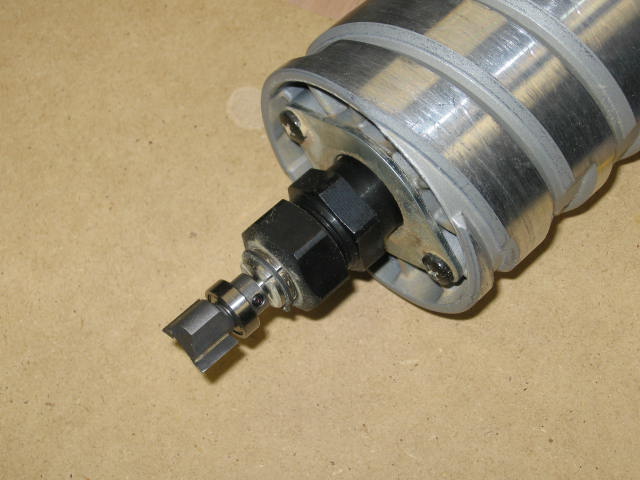
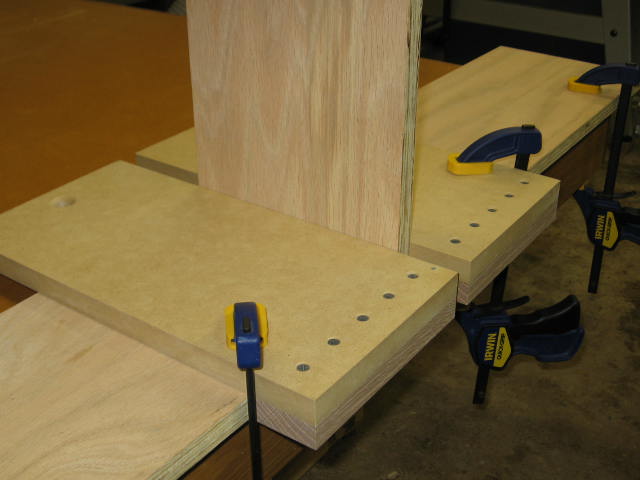
The spacer is removed and the dado is cut with the bit's bearing riding against the edges of the jig halves. The first pass is made by running the bearing along the edge of one jig half. The second uses the other jig half and widens the dado out to its full, correct width.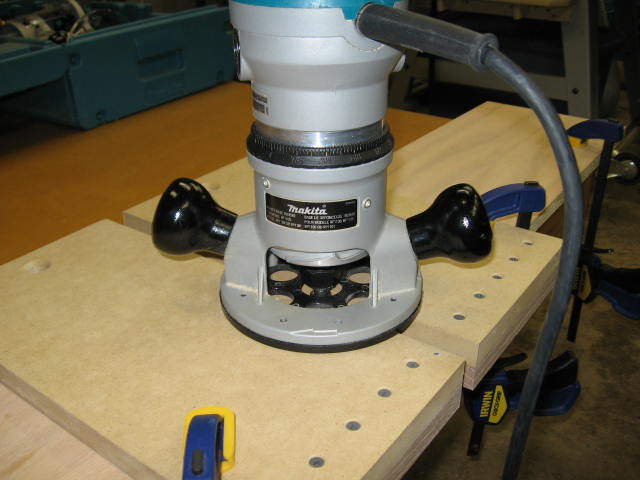
And that's all there is to it! If there's a quicker and easier way to cut dados with a router, I've not found it. I should mention that although I've seen this same basic idea elsewhere, I made my jig by cheerfully copying a design from router guru Pat Warner, a frequent contributor to Fine Woodworking Magazine. Thanks, Pat.
The jig consists of two identical halves; the first picture below shows one half right-side-up, the other upside-down. Each jig half is just a rectangular piece of 3/4" thick MDF, sized as needed (mine are 7" x 14") with a hardwood fence attached across one short end. The only critical part of the jig's construction is to make sure the fence is perfectly square with the long edges of the MDF.
The remaining pictures illustrate how the jig would be used to build a bookcase out of 3/4" plywood.
First, the end panel of the bookcase is secured to a bench or worktable and one half of the jig is clamped into place, with one long edge of the MDF aligned with one edge of the required dado. Note how the hardwood fence indexes against the workpiece, making the jig halves self-squaring.
Next, a scrap piece of shelf material is set into place as a spacer to properly locate the other half of the jig. This is a foolproof way to ensure that the width of the dado will exactly match the thickness of the piece it will receive.
The dado will be cut using a top-bearing pattern maker's bit. This one is 5/8" diameter, which works well for 3/4" plywood, whether it is slightly undersized or a full 3/4" thick.
The spacer is removed and the dado is cut with the bit's bearing riding against the edges of the jig halves. The first pass is made by running the bearing along the edge of one jig half. The second uses the other jig half and widens the dado out to its full, correct width.
And that's all there is to it! If there's a quicker and easier way to cut dados with a router, I've not found it. I should mention that although I've seen this same basic idea elsewhere, I made my jig by cheerfully copying a design from router guru Pat Warner, a frequent contributor to Fine Woodworking Magazine. Thanks, Pat.


")
 No really, those are some good ideas too and appears to actually be easier due to the top bearing bit. Probably wouldn't be as hard to dado exactly where you want to either.
 Loring in Katy, TX USA

Comment