Industrial Sewing Counter, Pt 1 (27 pics)

Collapse
This topic is closed.
X
X
 
  • Time
  • Show
Clear All
new posts
  • LarryG
    The Full Monte
    • May 2004
    • 6693
    • Off The Back
    • Powermatic PM2000, BT3100-1

    Industrial Sewing Counter, Pt 1 (27 pics)

    After finally getting a digital camera, late last year, the extreme heat of Summer 2006 reduced my time in the workshop to almost nil, giving me no finished projects to photograph. But here is one project from this fall, presented in photo essay form.

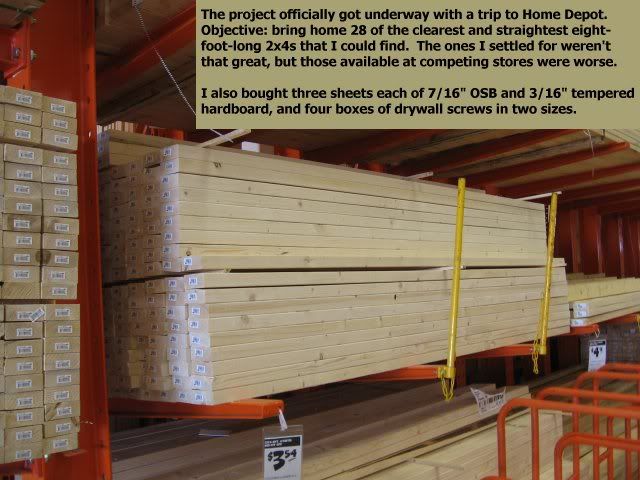
    The job involved building an L-shaped countertop for a friend's sewing business. She was on a tight budget, which meant that only the most inexpensive of materials could be used: ordinary framing lumber, OSB, hardboard, drywall screws.

    Which further meant that I wouldn't be doing fine woodworking, per se, but something more like glorified rough carpentry. Even so, I decided to approach the project's construction in much the same way I would build a piece of furniture. That my friend's budget limited us to humble materials didn't mean I shouldn't try to give her a finished product that was as well-built and as attractive as I could possibly make it under the circumstances.

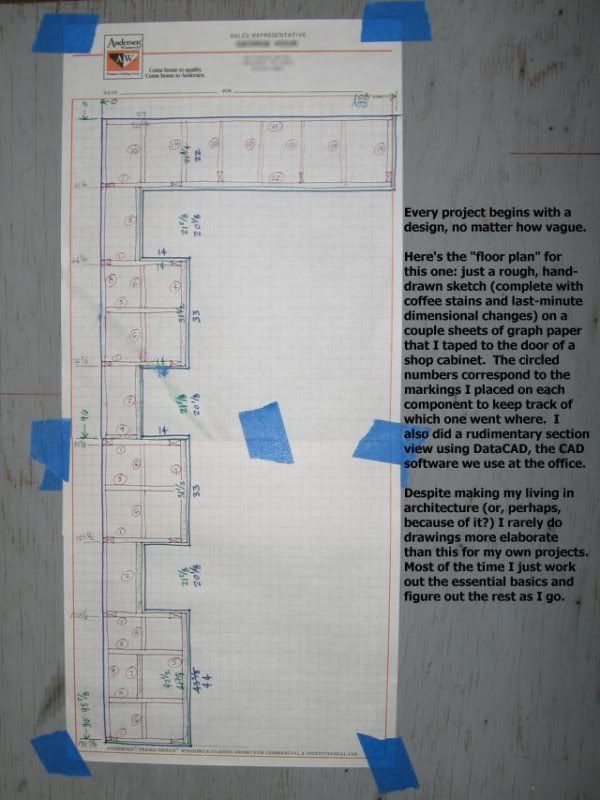
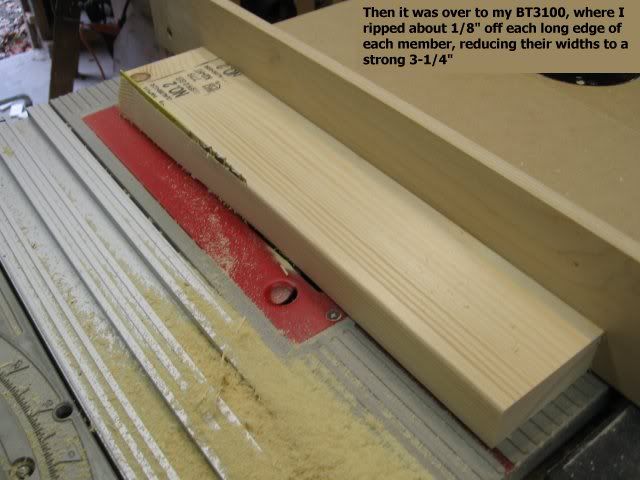
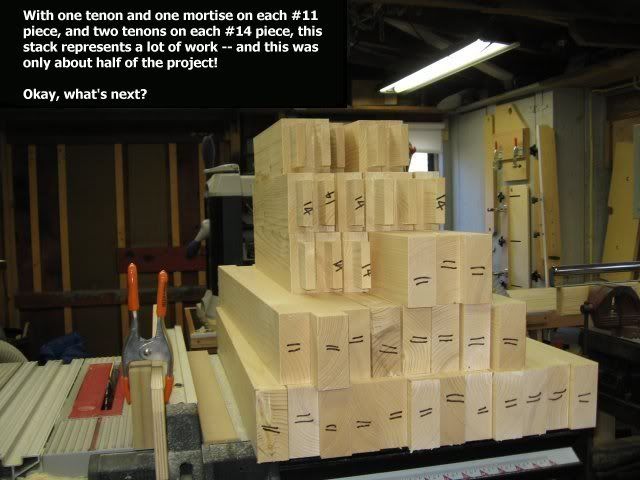
    I began as I always do, by making a number of crude sketches to explore how the counter might be built, and just generally letting my brain cells work on the design, almost subconciously. The main dilemma I fought from the beginning was that building with 2x4s usually results in assemblies that are crude and bulky, with inelegant joinery. After much deliberation, I decided to invest the time required to mill the rough 2x4s four-square, and to employ mortise and tenon joinery for most of the connections.

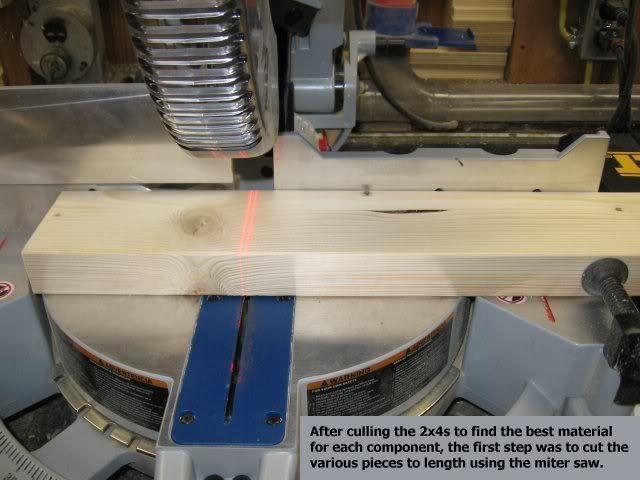
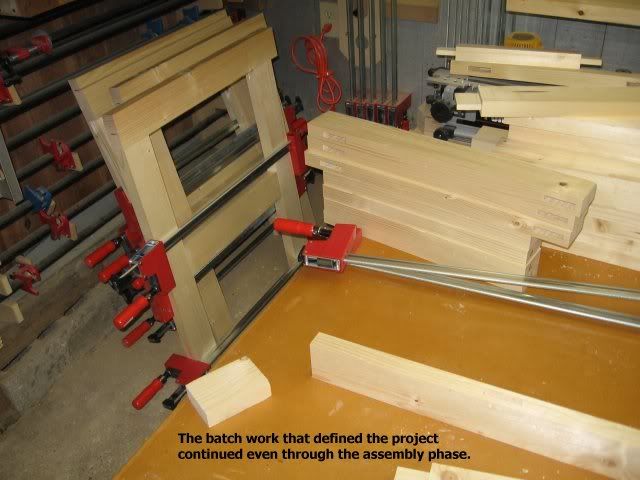
    The following series of pictures documents the workshop phase of prefabricating the Industrial Sewing Counter, step by step, from start to finish. I'll show you the on-site final assembly phase of the project in another thread.
    Last edited by LarryG; 12-16-2006, 06:20 PM.
    Larry
  • LarryG
    The Full Monte
    • May 2004
    • 6693
    • Off The Back
    • Powermatic PM2000, BT3100-1

    #2


    Last edited by LarryG; 12-22-2006, 11:38 AM.
    Larry

    Comment

    • LarryG
      The Full Monte
      • May 2004
      • 6693
      • Off The Back
      • Powermatic PM2000, BT3100-1

      #3


      Last edited by LarryG; 12-22-2006, 11:39 AM.
      Larry

      Comment

      • LarryG
        The Full Monte
        • May 2004
        • 6693
        • Off The Back
        • Powermatic PM2000, BT3100-1

        #4


        Last edited by LarryG; 12-22-2006, 11:40 AM.
        Larry

        Comment

        • LarryG
          The Full Monte
          • May 2004
          • 6693
          • Off The Back
          • Powermatic PM2000, BT3100-1

          #5


          Last edited by LarryG; 12-22-2006, 11:40 AM.
          Larry

          Comment

          • LarryG
            The Full Monte
            • May 2004
            • 6693
            • Off The Back
            • Powermatic PM2000, BT3100-1

            #6


            Last edited by LarryG; 12-22-2006, 11:41 AM.
            Larry

            Comment

            • LarryG
              The Full Monte
              • May 2004
              • 6693
              • Off The Back
              • Powermatic PM2000, BT3100-1

              #7


              Last edited by LarryG; 12-22-2006, 11:42 AM.
              Larry

              Comment

              • LarryG
                The Full Monte
                • May 2004
                • 6693
                • Off The Back
                • Powermatic PM2000, BT3100-1

                #8


                Last edited by LarryG; 12-22-2006, 11:42 AM.
                Larry

                Comment

                • LarryG
                  The Full Monte
                  • May 2004
                  • 6693
                  • Off The Back
                  • Powermatic PM2000, BT3100-1

                  #9
                  This concludes the portion of the project that I was able to prefabricate in my workshop. For the on-site final assembly phase, please see the thread entitled, "Industrial Sewing Counter, Pt 2." Thanks very much for looking!
                  Last edited by LarryG; 12-16-2006, 06:26 PM.
                  Larry

                  Comment

                  • onedash
                    Veteran Member
                    • Mar 2005
                    • 1013
                    • Maryland
                    • Craftsman 22124

                    #10
                    How did your planer hold up after all those 2X4's?

                    What kind of camera????
                    YOU DONT HAVE TO TRAIN TO BE MISERABLE. YOU HAVE TO TRAIN TO ENDURE MISERY.

                    Comment

                    • niki
                      Senior Member
                      • Nov 2006
                      • 566
                      • Poland
                      • EB PK255

                      #11
                      If I compare it to me, you are Factory...

                      And you have very nice machines

                      Glad that the pics worked in full size

                      Looking forward for part 2

                      niki

                      Comment

                      • Tom Miller
                        Veteran Member
                        • Mar 2003
                        • 2507
                        • Twin Cities, MN
                        • BT3000 - Cuttin' it old school

                        #12
                        Great write-up, Larry! I applaud your attention to detail, even when, as you say, the materials are not exactly furniture-grade. In the end, your finished product isn't going to look anything like 2x4 construction. I'm sure your friend knows she's getting a pretty good deal.

                        I'm looking forward to more pics from your shop, too, now that you've got the digital camera!

                        Regards,
                        Tom

                        Comment

                        • mater
                          Veteran Member
                          • Jan 2004
                          • 4197
                          • SC, USA.

                          #13
                          That is what I call a detailed explanation. Great pics Larry.
                          Ken aka "mater"

                          " People may doubt what you say but they will never doubt what you do "

                          Ken's Den

                          Comment

                          • TheRic
                            • Jun 2004
                            • 1912
                            • West Central Ohio
                            • bt3100

                            #14
                            Looking great!!! Your pictures and explanations pretty much says it all. Can't wait to see part 2 and the finished project!!
                            Ric

                            Plan for the worst, hope for the best!

                            Comment

                            • lrogers
                              Veteran Member
                              • Dec 2002
                              • 3853
                              • Mobile, AL. USA.
                              • BT3000

                              #15
                              After looking at the part 2 pictures, I didn't (though I should have) realize how much prefab work into that. Awesome job Larry.
                              Larry R. Rogers
                              The Samurai Wood Butcher
                              http://splash54.multiply.com
                              http://community.webshots.com/user/splash54

                              Comment

                              Working...