

 Tweet
Tweet
Man that is lookin' shaweet!!
-
JR -
Almost too pretty to be in the shop. You really ought to build up some raised panel doors and drawer fronts for that thing... See if your wife will let you roll it into the dining room...Please like and subscribe to my YouTube channel. Please check out and subscribe to my Workshop Blog.Comment
-
That's looking very cool. How are those mobile base wheels & feet working out for you?
I picked up a template for when I did my Jessem lift. Well worth the little extra cost.
Why did you have to ensure that the template was "perfectly parrallel" to the table? A router bit is round, doesn't matter if it's not exactly perfect.
I picked up a second rip fence for my router extension and the shop made router fence is fastened to it with t-nuts. I like being able to use the c-man micro-adjuster on the router fence.ErikComment
-
And you think my wife would let me cut wood in the dining room?
Seriously, those are kind words but its just a plywood carcass with some edging. I could have left the bare ply on the edges but it doesnt take much effort to add and it helps with wear and tear as well as looks. I could have used maple but I just happen to have a whole bunch of 3/4 sq walnut strips so they got used. It does make a nice contrast Jon
Jon
Phoenix AZ - It's a dry heat
________________________________
We all make mistakes and I should know I've made enough of them
techzibits.comComment
-
Actually pretty well in terms of maneuverability, I have had one issue in that trying to raise it up with the orange levers is tough and one broke. I contaced HTC and said "what gives this is supposed to support 500 pounds!" I had an email excahnge with their rep who kept going on about the levers only needing to lift 15-20lbs to get clearance. I tried to ask how they figured this as while I understand it wouldnt need to lift the entire weight, if the base is rated at 500lbs then those levers need to be able to support way more than 20lbs. Bottom line was she sent me a new lever and I have to be more careful when lifting it on to the castors.
Yup, I know I could have made one but I think the time plus the extra chance of an error was worth it.
As far as the parrallel issue, knowing how anal most (some) of us are, the idea of standing over the table and seeing that plate askew to the table would grind on me forever
When I first got my BT I had a router fitted to the assy table. I built fence that attached to the back of the rip fence but there can be an unacceptable amount of deflection from the back. This doesnt really come into play when ripping as you have already made the cut by the time it comes into play. using it for a router fence the opposite is true so I thought if I had gone to this much trouble a router fence isnt much more...Jon
Phoenix AZ - It's a dry heat
________________________________
We all make mistakes and I should know I've made enough of them
techzibits.comComment
-
Normal Service will be resumed as soon as possible
For those of you that were waiting for the next installment of the Mobile Base Diaries I humbly apologise as there is no episode this weekend.
I had to work all day yesterday on a video and photo shoot.
I did get the saw and rails permamently fixed this morning and just mounted the router in the plate but now have to go out.
Normal service will be resumed next weekend.Jon
Phoenix AZ - It's a dry heat
________________________________
We all make mistakes and I should know I've made enough of them
techzibits.comComment
-
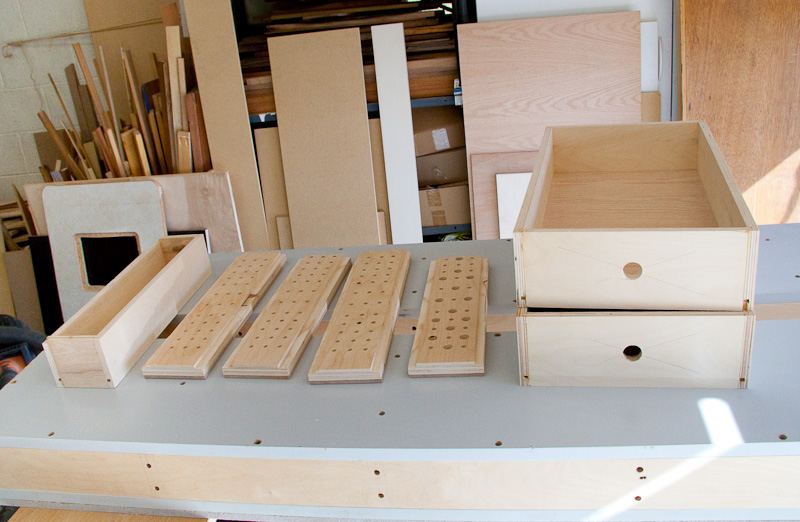
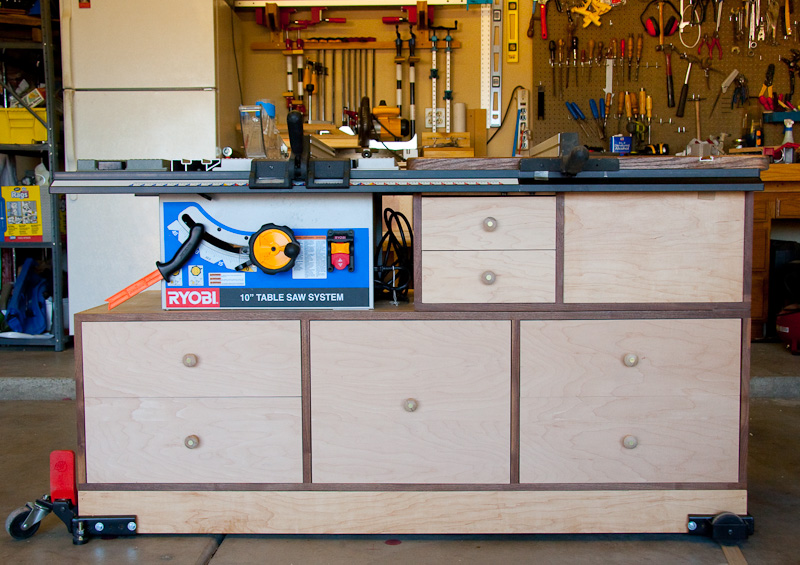
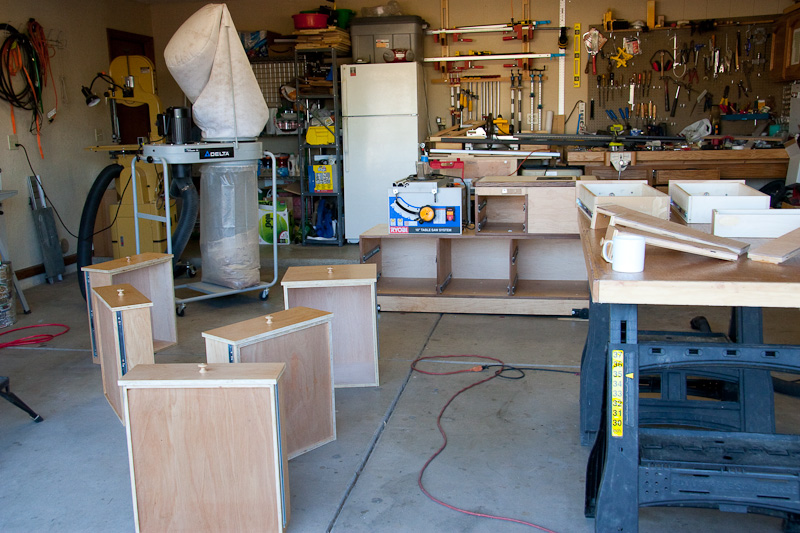
Weekend #7 finishing the drawers.
I managed to get back in the shop this weekend and this project is very near completion. WIth the saw now bolted to the base and the rails shimmed and attached to the router table extension I set to making the last few drawers for the front and the bit and tool storage for the router table.
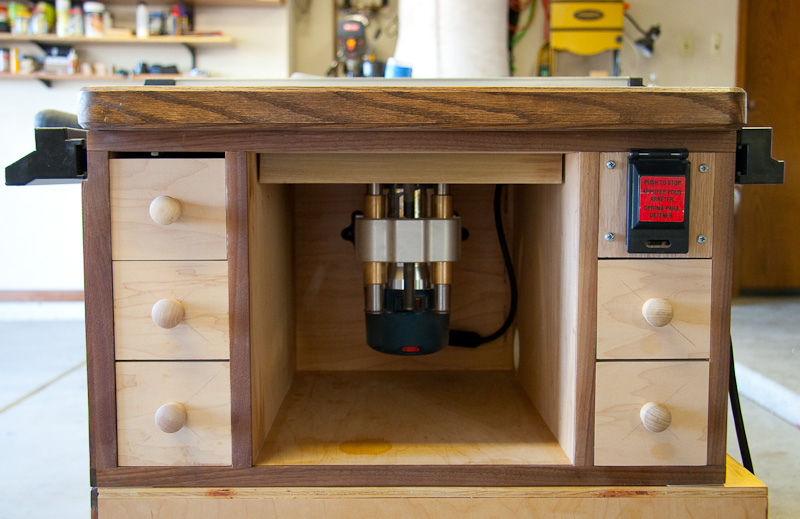
The last two drawers were made using the same techniques as the others although this time I used my new router table to cut the dadoes and rabbets. I really love this new router lift, it makes everything so easy. Bit changes above the table with the quick lift feature are awesome. Also the lift mechanism makes height changes to within 0.001" a snip.
I constructed 4 bit drawers from 3/4" ply drilled initially for 1/4" bits and then enlarged for 1/2" ones. I then backed it with some 1/4" ply. This provides for way more bits than I currently own but will help me stay organized as I add more. The top left drawer is a small one but will be home to all the router wrenches and lift adjusters etc.
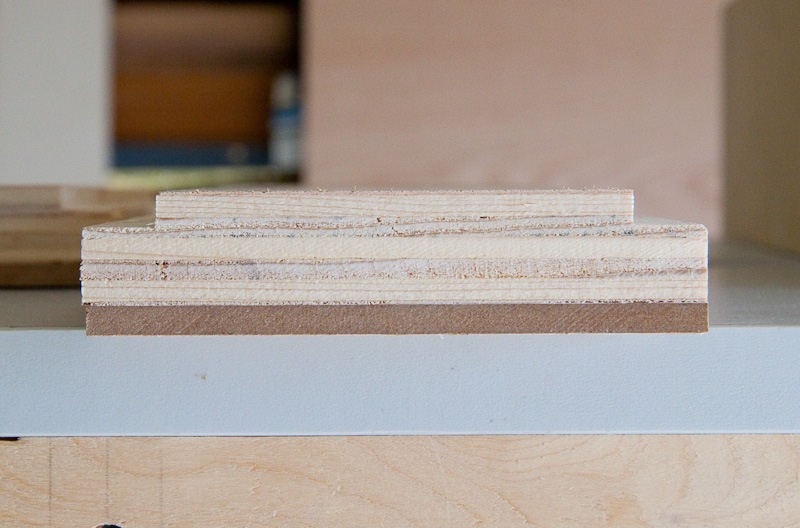
Here is the end view of one of the bit drawers where you can see the lamination and the rabbets cut where it slides on the 1/2" ply runners.
For the fronts I simply cut a dadoe and gluded and clamped them
I cut and fitted all the drawer fronts. You can see the large hole in the top drawer. I did this so I could use the standard hardware that came with the pulls rather than use longer screws.
Here they are completed in the router table.
And here is the front view with all the drawer fronts fitted along with the wooden pulls (Thanks Pappy).
The only thing I didnt quite have enough time for was the door on the router compartment. That will have to be the last job next weekend along with a few coats of shellac and/or poly.Jon
Phoenix AZ - It's a dry heat
________________________________
We all make mistakes and I should know I've made enough of them
techzibits.comComment
-
Absolutely beautiful. Very fine workmanship.Comment
-
Very nice!!!Comment
-
Jon
Phoenix AZ - It's a dry heat
________________________________
We all make mistakes and I should know I've made enough of them
techzibits.comComment
-
Jon, beautiful work. It looks great and I am sure it will give you many many years of service. More important, thanks for taking the time to document and post your work. It has been very educational. Turaj (in Toronto)
"When I read about the evils of drinking, I gave up reading!" Henny Youngman
Comment
-
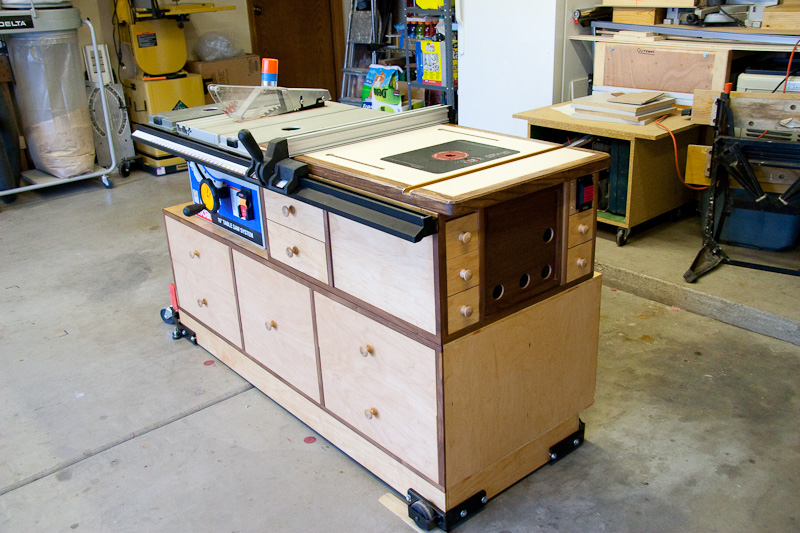
Weekend #8 FINISHED!
The end really was in sight as I headed into the shop this weekend. The last thing that needed to be built was the door for the router compartment. All that was then required was some finish and that was that
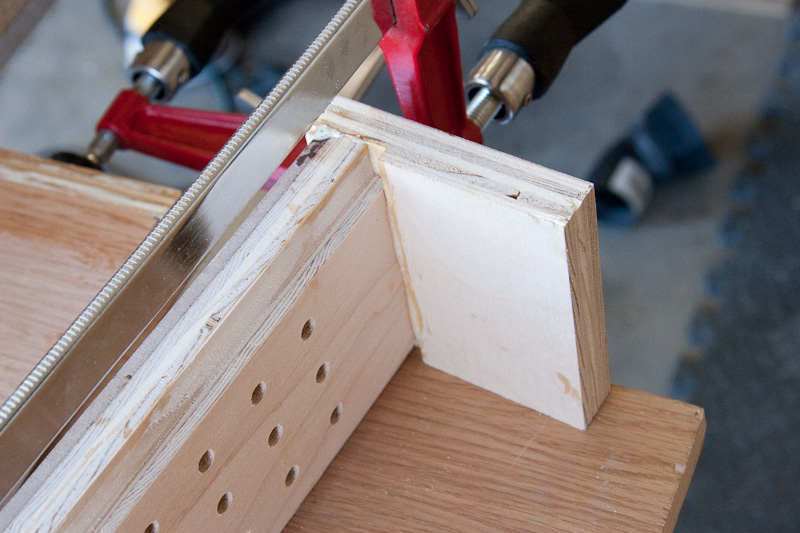
The door is a very simple construction. I used more of that stash of 3/4" Sq walnut (not sure what I will do when it runs out).
A couple of light passes of the jointer and planer to true them up was all that was required to prepare the stock
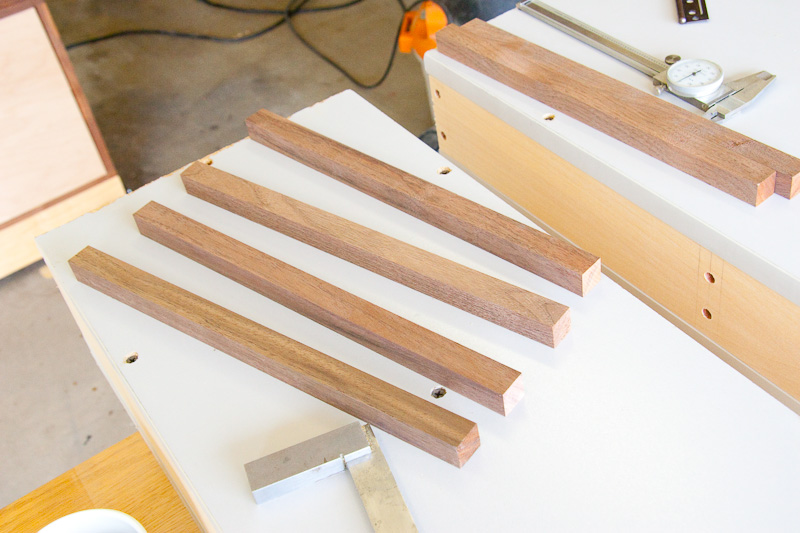
I mitered them to length and cut a slot along the inside faces to accept some matching walnut ply. I did consider using lexan but I didnt have a piece handy that was big enough and didnt think it was worth the time or cash to go buy some for the sake of being able to see into the router compartment. As the slot cuts into the surface of the miter I reinforced the joints with a screw
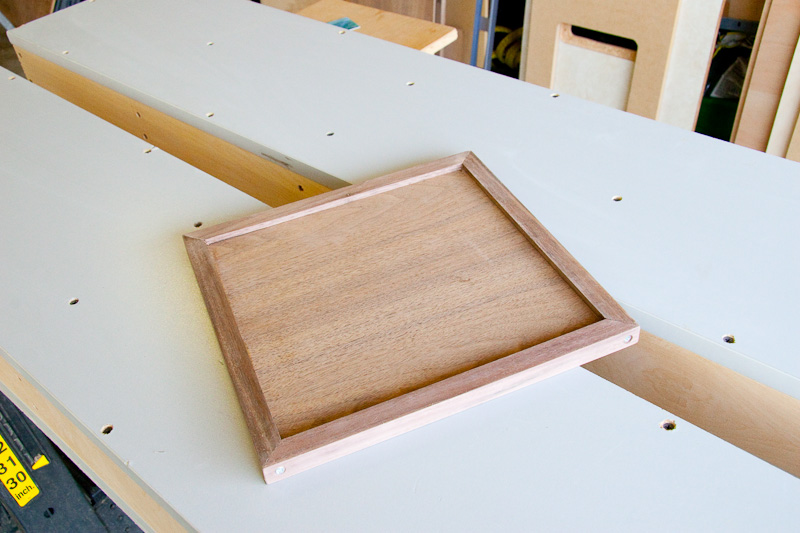
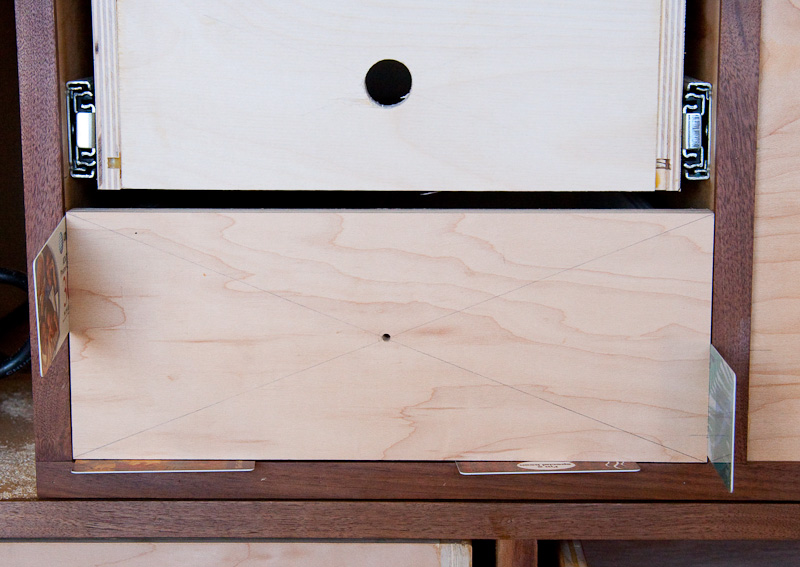
Here is the door fitted. You can see I cut some holes for the "makeup" airflow and one to act also as a handle.
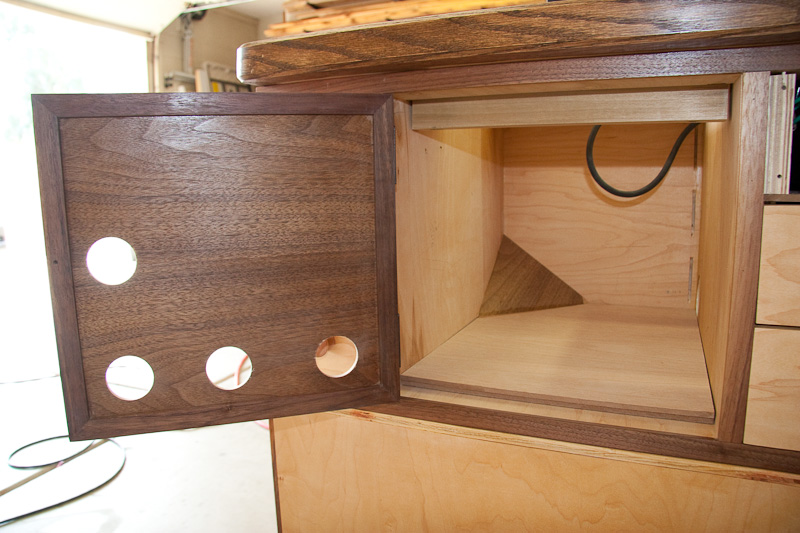
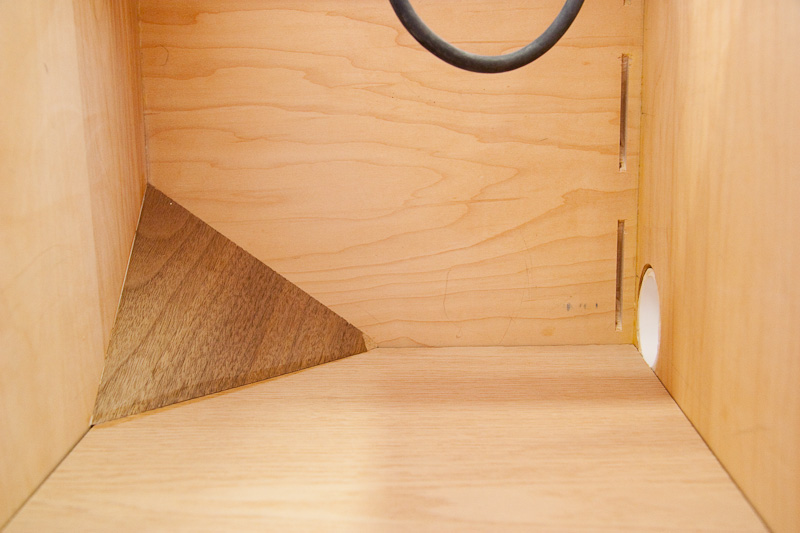
I also added a couple of layers of 1/4" ply to raise the level of the router compartment floor to just above the base of the DC port. I then added a triangular baffle in the back corner to help with airflow and prevent dust collecting in that corner.
All that remained was to apply some finish. I had managed to apply a seal coat to most of the subcomponents as they were built but it still was easiest to take off the rails and drawers and give them a few coats of wipe-on.
Once dry, reattached and reset the rails, and put all the drawers in place. I now have to figure out what goes in which drawer and I have a few ideas for some internal storage "helpers" but other than that I am DONE!
Of course there is still a router fence to make but thats another story. Thanks for watching, As it is now finished I will post a couple of final pics to the "finished projects" area.
 Jon
Jon
Phoenix AZ - It's a dry heat
________________________________
We all make mistakes and I should know I've made enough of them
techzibits.comComment
-
That turned out really well. Be sure to update the thread on any changes or "I wish I did it this way" instead.
When I read the first line about the "end being in sight" in past tense. I felt on 'oh-oh' coming on.
ErikComment
-
Silly question - did you empty your DC bag during the project? I noticed that you had shots of it on weekend #1 and weekend #8 (and a few in between) and you can see that a LOT of dust made it in there. I imagine more of it did not make it in there, but to me it is interesting to look at how much waste there is on projects. I am always astounded by how much dust you make just taking off 1/64" or less while sanding, much less when cutting all the dados for a torsion box.Comment
-
No thats pretty much all from this project. When you consider that this project is nearly all plywood therefore hardly any jointing or thicknessing thats quite a lot of dust. Plus the fact that for sanding I use my shop vac.
For an average HW project it fills up much quicker and if its a big one possibly even a whole bag.Jon
Phoenix AZ - It's a dry heat
________________________________
We all make mistakes and I should know I've made enough of them
techzibits.comComment


Comment